 Welcome to BigVanRepairs.co.uk
BigVanRepairs.co.uk
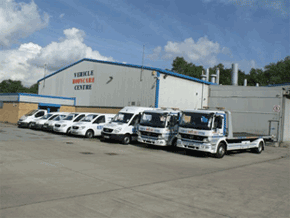
Vehicle Bodycare Group, Leeds - 0113 2480481
Please select a repair type:
Aluminium Repairs
Tipper Body Images
Image One:
This shows the vehicle in its original damaged state.
Damage had occurred to the O/S side panel, cantrail, and crossmember's of the Aluminium Tipper Body.
An insurance engineer referred this vehicle to us after the insured had taken the vehicle to another repairer who had repaired damage to the cab but was lost when it came to the Aluminium Body and had suggested the fitting of a new body.
Image Two:
Vehicle tipper body is now repaired and the damaged non-repairable parts have been cut away and the crossmember’s realigned and the old panels are now prepared to accept the fitting of the new replacement sections of the body.
Image Three:
Vehicle now almost completed with just the lower front corner gusset panel to be welded into position. Once this is done the vehicle will be checked for the full operation of the tipper body before returned to the insured.
This is an example of where Vehicle Bodycare Centre could have completed the repairs in full as a one-stop repair and delayed downtime for the client instead of two different repairers having to do different parts of the repair.
Major Aluminium Ambulance Repair
Images One to Four:
These 4 images show the original damage to the ambulance, which is of Aluminium Construction. The vehicle had rolled onto its O/S and twisted the rear end of the body as shown in image 2. The N/S rear corner was damaged as in image 3, and in image 4 you can see the kink in the inner rear roof crossmember panel.
Images Five to Eight:
The next 4 images show the inner damage to the upright inner O/S stays and the O/S rear corner pillar. Image 5 shows how the rear corner panel has distorted the roof panel as it has been damaged when the vehicle rolled.
Images Nine to Thirteen:
9 & 10 Shows vehicle being pulled on the Caroliner 6.2 meter Jigs with its sophisticated pulling equipment. We need to square up the body before we cut away any inner or outer panels.
11 & 12 Shows after pulling the new O/S rear corner pillar replaced and the inner stays that were very badly twisted cut away before we replaced the uprights to enable us to fit the new outer sidepanel. After replacement uprights installed the before we replace the outer sidepanel all the rest of the interior ambulance equipment has then to be removed.
Image 13 shows the new full O/S sidepanel in place after cutting out the door and window apertures
Images Fourteen to Sixteen:
These three images show the vehicle in a completed state and being quality checked on one of our specialist lifts for this weight of vehicle. You will see that all the specialist equipment and coachlines are replaced including the specialist tailift door.
When the vehicle has passed all the quality control checks it will be returned for the operator to put straight back into service.
Click For:

Click For: